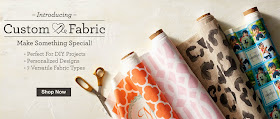
(Zazzle did provide me with fabric for this post but as always all opinions are my own.)

I think these new custom fabrics are so exciting. Now I can add my own designs to their fabric and craft or sew to my hearts content with a pattern or design that's totally unique. You don't have to have a Zazzle shop or be a designer to create your own fabric either. Anyone can do it. Zazzle makes it very easy to just upload your own photos or designs and then they do the rest of the work. They also offer several different fabric styles to choose from depending on your needs.
With two girls in the same room I decided to make two memory boards- one for each girl with different fabric. The illustrations I used for these are special because I created them for my daughters Rainbow Zoo birthday party last year. I can honestly say I was blown away by the print quality on the fabric. I was worried since my illustrations had thin lines and bright colors that they might print poorly. Not at all. They were perfect. Zazzle did an amazing job. Which is why I'm happy to be selling these new designs in my Zazzle shop.
So let's make a memory board.
The supplies you'll need:
12x12" Cork tile x 3
16x16" fabric
12x12" Batting x2
2x Ribbon 21"
4x Ribbon 15"
9 Decorative Upholstery Nails
Hot Glue
Staple Gun
I got my fabric through Zazzle but any cotton fabric will do. I recommend using a sturdy cotton fabric that will hold up to staples and thumbtacks. I purchased the cork board tiles from Walmart's office supply section. I bought the batting at Michaels but it can be found in any craft store sewing section.
The tiles are fairly thin so I hot glued three of them together to make them thick enough to stand up to thumbtacks and staples.
Then I cut out two 12x12" pieces of batting and placed a small amount of hot glue at each corner to hold it down.
I cut the fabric 16x16" so there would be a 2" section on each side. Just enough to wrap around and staple to the back.
I used a staple gun to attach the fabric but this could be done with hot glue as well. The staple gun is very fast and easy and no burned fingers. I love that you don't have to wait for it to cool and set. However it is a staple gun so you still have to be careful.
In an attempt to keep it as neat as possible I stapled two opposite sides first, pulling the fabric as tight as possible so it wasn't loose. Then I folded the corners in like I was wrapping a present and stapled to hold them down. I used three to four staples per side.
For the ribbon I knew I wanted a certain size of diamond on the board, so I just kind of played with the position of the ribbon until I was happy with it. I used thumbtacks to hold the ribbon in place while I attached the upholstery nails. The nails are pretty difficult to remove so it helped to have the thumbtacks there just in case I needed to move things around a bit.
Once the nails were in place I used a dab of hot glue on the ribbon to attach it to the backside of the board. I know this doesn't look pretty but I wasn't worried about appearance since it was just going in my girls room. However you could use duct tape or framing tape to make the back look a little neater.
To make this hangable I attached a piece of twine to the back with staples and hot glue. Also not the most professional looking but it was what I had on hand.
Of course I picked up some cute clothespins and thumbtacks for the board, so my girls would have no problem attaching things. These aren't' necessary since you could just use the ribbon to hold items on but it makes it fun.
Marina has had fun with her board, she changes it out everyday. She draws a lot so there's always new artwork to display.
I gave Mara the tiger board and she's had so much fun finding different favorite items. Mara doesn't like to draw but she collects a lot of things. So this is the perfect place for her to display her mementos and treasures.
After making these for my girls I was really surprised at how easy it is. I can see a memory board in my near future for my office. It would be the perfect place to tuck business cards, notes and pictures. If you make a memory board I would love to see it or even hear about your memorable experience (oh that was punny).
Thank you Zazzle for the beautiful fabric. You helped us make some wonderful memories.
For these fabrics or other products with my illustrations and designs visit my Zazzle store.
~Sunny~


No comments:
Post a Comment
Of course I would love to hear your comments and thanks for dropping by.